|
Padlet is another district approved application that can be used with students that I think has great potential for increasing student engagement. Padlet is a web-based application that allows teachers to set up a board with topics, or questions and allow students to share their ideas. Padlet has added a number of features recently that make it a great tool for all ages. Originally students could add ideas by creating a note, like a sticky note where they would type their ideas on the note. This could be difficult for our younger learners. Padlet has added the use of audio and video to notes. Students can record their ideas and post it to the board. Padlet has also added the ability to draw on a note. This is a cool feature, but using a mouse or trackpad can be a little challenging. Here are some examples of Padlets Gallery of Padlets Book Report This example caught my attention because it included comments by the classmates of the student who created and posted the book report. It creating an interactive feed for discussion about literature. Field Trip Photo Contest I really like this idea. The sharing of images to represent ideas or concepts is an interesting way to demonstrate learning. Without taking students on a field trip, how else could you use the picture contest in your classroom? Templates for School - Offers a number of templates/ideas for how to use Padlet in school. With Padlet, you can create a board and share with students, allowing them to add their ideas. Sharing is similar to Google Docs. You can share by adding emails, or you can share the link to the board in Google Classroom. Sharing the link is the easiest way to do this. Once participants begin adding ideas, they can move the notes around the board to better organize the ideas. You can use the boards for brainstorming, organizing information, making comparisons, displaying student work and so much more. Each time I explore Padlet I learn more ways that it can be used with students to engage them in their learning. One example occurred this week when a teacher asked for a suggestion to create a Parking Lot for her students to provide them with a way to provide reminders about classroom responsibilities. When we explored Padlet we learned of the new features of adding audio and video to the post as well as adding Gifs. The image below shows some of the exploratory learning the teacher and I did as we worked on a Parking Lot. 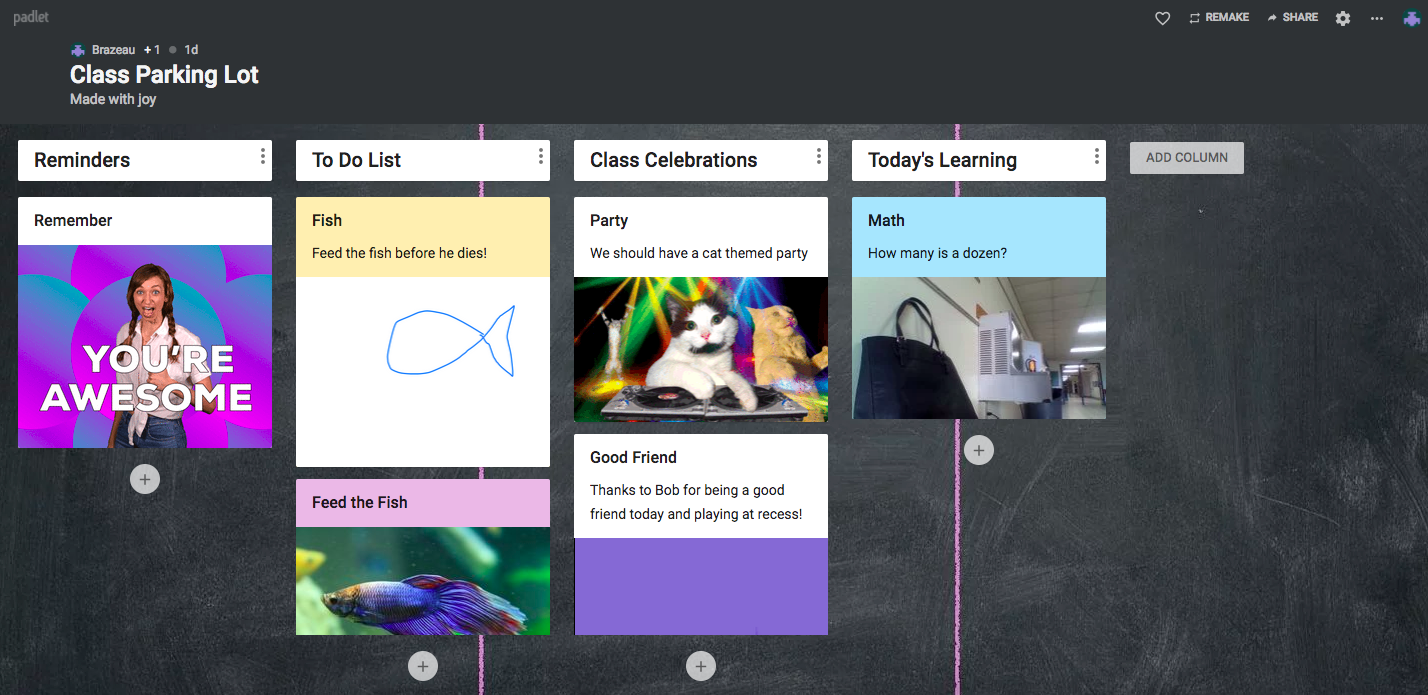 Padlet is a great tool for collaboration and group thinking. It can also be used by students to create a portfolio of their work. If you have questions about using Padlet, please let me know. I would be more than happy to meet and assist you with creating a learning activity that meets your students' learning needs.
0 Comments
I am so excited to share the news that we are now able to use the resource Recap also known as Let'srecap. It is a web-based application that allows a teacher to set up a classroom type environment to create discussions with students. Teachers can create Queue's which are like topics to help organize a conversation or activity. Within a Queue, teachers create questions for students to respond to. You might be thinking that Google Classroom already has this feature. We can ask questions and allow students to respond and interact with other students in the class. You are correct. However, Recap offers students the opportunity to respond using audio video recordings. A teacher could also connect several classes into a Queue as it is a conversation rather than a class of students. Why would I want to have students do audio video responses instead of writing?
What are some examples of uses for this?
Verbal Assessment of LearningI was discussing Recap with a world language teacher the other day and she shared that she has students do one on one conferences with her to show their level of language acquisition. She has students speak with her in the language they are learning to determine their level of progress. She mentioned this was difficult to keep up with as she had to provide something for the rest of the students to do while she was conferencing with students individually. With Recap she could have the students complete the same speaking activity and then watch it later to assess the students. If a student was having difficulty, she could have a conference with that student to provide the necessary feedback and be able to show the student their video to help them see and hear what the teacher sees. SetupTo create an account go to Letsrecap.com Click Signup then select Teacher. You can sign in with your Google Account. We have a signed FERPA agreement with Recap so this is approved to use with students. 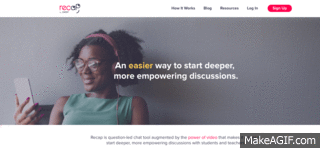 Creating ContentAfter you have created your account, you can now begin creating Queues or topics. Click on the Add Queue button and then enter the title of your Queue. The examples I created were for events that I presented at. After you add the Queue, you will then be able to add questions. Click the Add Questions button and then add your question or thinking prompt. It will first add the question where students could respond in writing. 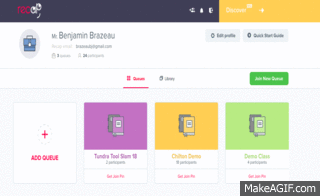 If you click on the Q icon you will then click video responses. This will open up the settings to add the option for students to respond using audio and video responses. When you click Next you will be able to adjust the type of response, audio and or video and the amount of time from 30seconds to 5 minutes. Last step set up a due date. One thing I found with this is you can't adjust the due date after the time has passed. You can duplicate the question, but you can't edit the time after the deadline.  Student LoginStudents can login similar to Google Classroom. They would go to Letsrecap.com and put in the code that you provide to them. You could add the link and information to your Google Classroom for ease of sharing. When students have the code they can sign in with their Google Account since we have a signed FERPA agreement. If you prefer to anonymize student data, you could create a set of usernames for your students and assign the name to them. They would need to chose the same name each time they logged in. Students could also create their own made up username when they sign in that isn't associated with their Google account, but again with a signed FERPA agreement students can sign in with their Google account. JourneysBesides adding Questions in a Queue, you can add a Journey. This is a 60 second video explaining the learning activity or posing a thinking prompt to students that leads them to delve into the topic and learn through inquiry.
Click the link to learn more about Journeys. Feel free to contact me if you have questions. I can show you an example Queue and provide you an opportunity to see both the teacher and student side of Recap. Alice Keeler wrote a post this summer about a new feature in Google Classroom where students could submit a response to an assignment by recording a video. They would click on the option to record video under the create tab in the assignment and it would use the built in camera to record their ideas. I am super excited about this feature because it unlocks so much potential for student learning and demonstration of knowledge and mastery of content and concepts.
Unfortunately the new feature currently only works on mobile devices through the Classroom App. I have been working on some work arounds to do something very similar in concept and be as user friendly as possible. What I have found is using an website that uses the device's webcamera and records video on the browser. It doesn't share this information with other parties and users can delete the video from the site when they have submitted their response. The site is https://www.cam-recorder.com/. It is very user friendly as the user will have to allow the site to access the camera and microphone and when they are done it quickly downloads and saves to the devices download folder. There is an option to put the response to youtube, but youtube is only accessible for grades 8-12, and for our purposes this would be an additional step since we are putting the responses into Google Classroom. Chatterpix is an amazing creation tool. It is very simple to use, in fact one of the examples I will share below is from my 1st grade daughter. Chatterpix allows you to take a picture of anything and then add your voice to that image. Students have created video projects about famous artists that includes images of the artist and their artwork. Others have recreated famous political speeches or had students record historical documents. Students could also create their own videos expressing their ideas for countless topics or projects. Students could take a picture of a document, page of text or notes and then record the main idea of the text. The image they choose has some importance and they can use their voice to explain the concept it represents. One limitation is Chatterpix only allows for 30 seconds of recording. How do you overcome that? Make several recordings and then using WeVideo or iMovie piece the clips together into one video. This is great for creating a group project where each student can do their individual piece and then quickly compile a video. If you don't have access to iPads, you could use Talkify by Abcya. Below are two examples of using Chatterpix along with iMovie or WeVideo to piece the parts together. The first video was of reading a story. The second was the Gettysburg Address. Are you looking for ways to have students present their mastery of content in a new or different way? Have students who you know have good ideas, but may struggle to get those ideas down on paper? Looking to create new ways to access student learning? Well here are a few ideas that may help you.
There are a multitude of video or audio creation apps and sites to assist you in this endeavor. Help the struggling writer
For some students writing is difficult. They may have great ideas, but just haven’t been able to get them on paper. These technologies and examples could provide students a chance to showcase their understanding and find their voice. The ideas presented here are my thoughts on using technology. Some of the examples are not fully explained in an effort to keep the document length manageable. If you would like to explore these ideas- the technologies or lesson ideas, please let me know. I would love to connect with your classes to assist you in creating engaging learning activities for your students. How many ways can students share their knowledge? It may be answered very similarly to the question "How many licks does it take to reach the center of a tootsie pop.? The world may never know. But let's try to find out! What are some ways to present your learning and knowledge?
How do you share these products?
Project Descriptions Build Something -
How do you get pictures from your phone to your computer?There are a few ways to do this and some of it depends on the type of phone you have.
1. Plug in and transfer - this is my least favorite method but it does work. It is least favorite because we don't always have our cords and it takes more time.
|
AuthorBen Brazeau Archives
February 2018
Categories |
 RSS Feed
