|
Want to help students organize their ideas and thinking and get more use out of the technology available to students? Looking for new ways for students to express their knowledge and understanding? I have shared other posts about templates like the Facebook Slides presentation, the Time Magazine Cover, or one of my favorites, the Virtual Museum. Today I discovered another resource for templates that you or your students can use to demonstrate their learning. This page has templates that are organized by grade level that could be used in a multitude of subject areas. One thing to note, is the author is Canadian, so some of the topics, especially historical references are not ones that would be common to American students. Beyond that, the multitude of choices and quality of many of these makes this a really great resource to help students present their learning in new and creative ways. I really like the magazine covers that were created like National Geographic and Rolling Stones are well done. Also think about how you could use a template like the Boarding Pass to create a learning adventure for your students. Check out more examples from Darren Maltais at his site Engaging Students Google Resources. One more resource for templates comes from Matt Miller who wrote Ditch That Text Book and more recently Ditch That Homework. He has a lot of great resources on his site. ditchthattextbook.com. He has created a number of Google Drawing Templates that could be used to help students organize their ideas, or help them plan for an activity. Check out his Google Drawing examples here.
1 Comment
Is your Google Drive becoming a wasteland for documents and files. You have created so many Google Docs, Presentations, Forms, and Sheets, but now can't find them? Well the previous post on Searching your Drive can help locate them. But how can we do a better job of organizing our stuff? 1. Create Folders - putting things in folders helps declutter and organize. You can easily create folders and sub-folders. 2. Color Code your folders - If you right click on a folder you can click the color pallet and chose a color that will help you more easily identify what is in the folder. 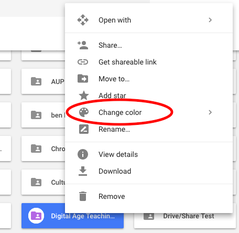 3. Add Icons To Your Folder. This is something I just learned about this week. You can copy and image and then rename your folder to include that image. Click the link above to learn more about how to add icons. This may not be something you do for every folder, but it may help you with organizing some of your work. 4. SHIFT-Z Put a document in more than one place. Shift-Z allows you to have the same document exist in more than one place. It is important to note that if you delete the document in one place you are deleting it from your Drive. The positive of this is you can put important documents like rubrics, lesson plans, etc. in more than one place so you are able to access them more easily.
The other day I came across a post on Twitter about how to search Google Drive. At first I thought, well I know how to search Drive, I can find the files I want when I want, but I opened it anyway. I am glad I did, because Alice Keeler included a number of tips and tricks that I didn't know. Please check out the presentation below, or click the link.
She also included a Challenge document where you can practice your newly acquired skills. When you have completed the assigned challenge, you can mark the first column with an x and you will receive a badge for your efforts. Think about the possibilities for this spreadsheet in your classroom. Do you have lessons or activities where students could have a similar spreadsheet in their Google Classroom where they earn badges for completing tasks in your classroom? If you have some ideas about how you might want to use this with students, please let me know and we can adjust the spreadsheet to meet your needs. 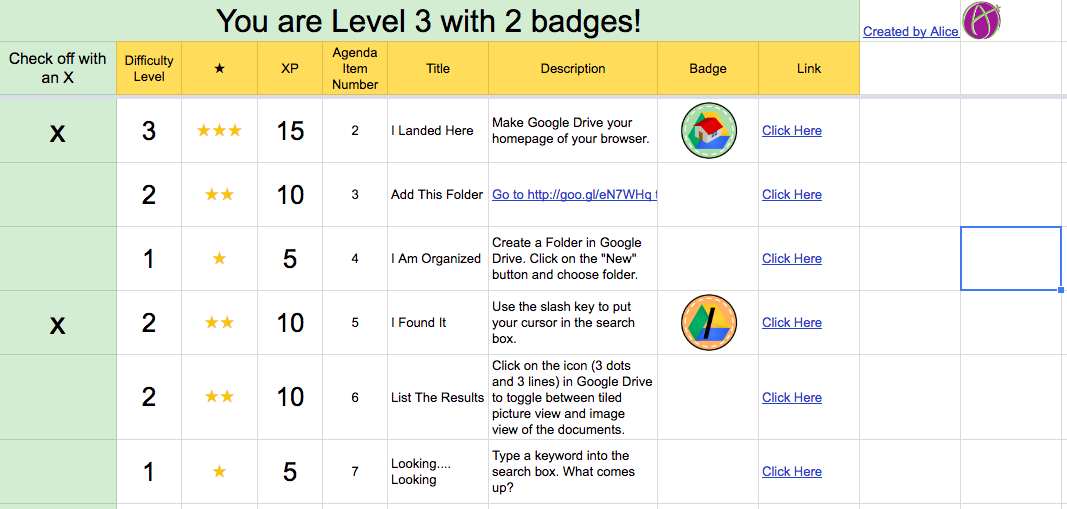
|
AuthorBen Brazeau Archives
September 2018
Categories
All
Categories |
 RSS Feed
